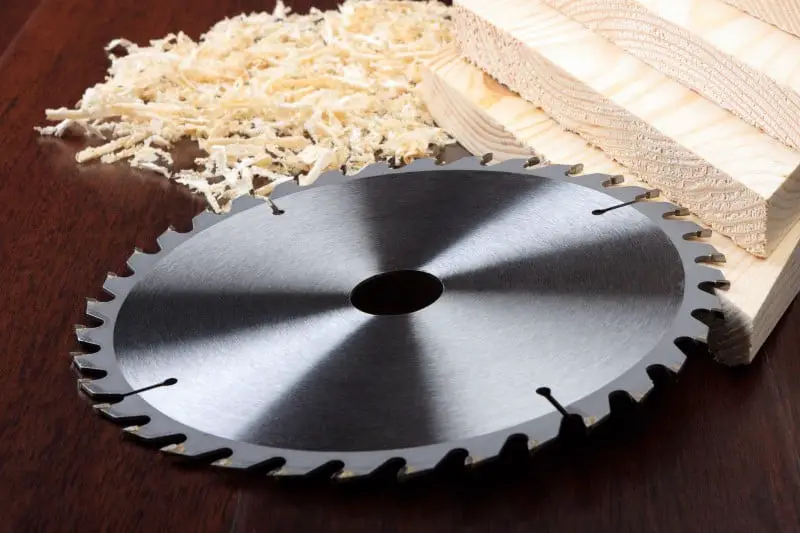
Dado blades are circular saw blades used for cutting wide grooves into the wood, a lot wider than a classic saw blade can cut. The cuts made by dado blades are generally done for interlocking purposes, which are used for building items such as cabinets, drawers, and bookshelves.
Although there are other ways to achieve wide cuts typically done with a dado blade with other methods (such as using a clamp with a miter saw or handheld router) dado blades are the best for cutting perfects grooves and joints. They are not only easier to use for groove cuts than these other tools but are much faster as well.
If you have a 10-inch saw and an 8-inch dado blade, you should be able to use them together. If, on the dado blade, the diameter of its arbor matches that of your saw’s arbor diameter, then yes, you can use 8-inchdado blades on 10-inch saws.
Dadoes don’t typically need to be cut any deeper than 1.5 inches. So, 8-inch dado blades will be able to cut most rabbets and dadoes – this eliminates the need for 10-inch dado blades. 8-inch dado blades are preferred due to being lighter than 10-inch blades, which makes it easier to cut deeper dadoes with your saw. 8-inch dado blades are also cheaper than 10-inch blades.
In this article, we will go over what the arbor is, how to check the arbor size and length of dado blades and saws, the types of joints you can cut with dado blades, and dado blade alternatives.
The arbor, if you did not already know, is where saw blades connect with the saw.
A shaft (also known as a mandrel or spindle) sticks out from the saw – this is the arbor. Its shape allows a blade to be mounted to it, and the motor then drives the arbor which ultimately rotates the saw blade.
The ‘arbor hole’ is the center hole in the arbor – this is where arbor size comes in.
A Primer On Arbor Length And Size
As mentioned previously, 8-inch dado blades will fit 10-inch saw as long as the arbor size and length is the same size.
Arbor Size
Here is what you need to know about arbor size:
Saws
Most table and radial-arms saws have about a 5/8-inch arbor size.
That said, sometimes they do not – you can measure it or, if you are buying new, you can usually find the arbor information on the packaging.
Blades
If you plan to buy dado blades and use them with your saw, you must make sure they have the same arbor hole size as your saw.
As stated, most saws have a 5/8-inch arbor size, so this is likely the arbor size you will want to look for in dado blades.
That said, this can change – when you are buying a dado blade set you must check that it has the right arbor hole size to fit with your saw.
If your saw blade has a larger arbor hole then it cannot be balanced properly and cannot be used with your saw. Also, if your blade’s arbor hole is smaller than your saw’s arbor, this will not work either.
Do not try to drill out the arbor hole in order to make it able to accommodate the blade – this can either put the blade out of balance or completely change the temper of the blade due to the heat from drilling.
If your saw blade is 10 inches, then it is almost certain that the arbor is 5/8 inches.
Arbor Length
Here’s what you need to know about the arbor length of saws and blades:
Many saws (like tables saws) have arbors that are too short to work with a dado blade; sometimes, they can only fit a dado blade up to a particular thickness.
In order for a blade to work with a saw, the blade must fit so that the arbor extends only a tad beyond the nut. So, if the nut is not fully threaded onto the arbor (with room to spare) then the nut could possibly come apart during the use of the saw.
For obvious reasons, the arbor length must be enough so that is extends beyond the nut – otherwise, you run the risk of injuring yourself or damaging your saw.
Now, let’s take a look at the different kind of joints you can make with dado blades.
What Joints Can You Cut With Dado Blades?
There are actually four or so different joint types you can make using dado blades.
These include:
Rabbet
The rabbet joint is likely the most common joint made with dado blades besides a dado joint.
This type of joint has a dado cut (or groove) that is cut along the end or wood edge; once the second piece of wood is fitted in the groove, the long side is flush.
Dado And Groove
A dodo joint goes across the wood grain – it’s a three sided channel.
The groove joint runs with the grain.
These three sides work together to from a bond that is restistant to shear and allows for a larger surface order for glue binding.
Tongue And Groove
With the tongue and groove joint, a ‘tongue’ sticks out from the wood board to slide into a groove cut of a different piece of wood – this creates a flat surface.
The tongue and groove joint is good for edge-to-edge joints.
This joint also gives room for the wood to expand and contract.
Half Lap
This type of joint is half as thick as the wood where they overlap cutaway.
With the half-lap joint, all the pieces of wood are joined together in order to create one big flat piece – this type of joint is very strong.
These joints have a bigger surface area perfect for glue bonding.
Now, let’s take a look at how you can make groove and dado cuts without the use of a dado blade.
Dado Blade Alternative
Although dado blades are best for grooves and rabbets, you don’t necessarily need a dado set for these cuts necessarily.
Maybe you found that your blade and saws arbors didn’t align, or you simply don’t have a dado blade laying around; if that’s the case, here is an alternative method for cutting grooves and rabbets.
This step-by-step is specifically to cut a groove, but can be used for rabbets as well.
Here’s how to cut a groove without a dado set:
Cut a spacer (rip a 1 inch deep cut from one face of the wood you hope to fit in the groove – the rip should be exactly the blade’s thickness).
Mark the location of the groove (use a sharp pencil or scribing knife – the blade depth should match your groove depth, no more than 1/3 the thickness of the stock).
Establish an edge of the groove (adjust the fence to that the blade is aligned with the side of your marked groove and lock it into place – then, put the spacer up to the outside of the fence, clamp a stop block up against the spacer).
Make the first cut.
Cut your second edge (remove your spacer and butt the fence up against the stop block – then, make the second cut).
Keep making cuts to clear the waste between the fence and stop block.
After each cut, move the saw fence over the blade’s kerf.
Finish the bottom (clear the groove; then, use a chisel or sandpaper to remove all ridges at the bottom).
You can use these same steps to cut rabbets as well.
Hi, I am Paul Smith. I am the man behind this blog. I am a passionate woodworker. I would like to share with you guys the experience of learning woodworking.
As someone who frequently works with medium-density fiberboard (MDF), I've learned that knowing how to waterproof MDF is crucial to maintaining its functionality and durability. MDF is a popular...
Area rugs can be an elegant and functional addition to any home. Over time, though, they tend to accumulate dirt, debris, and stains that can be difficult to remove. I recently discovered that...


 In 2023 (Buying Guide & Review)")


")