Epoxy is used in woodworking for a variety of reasons; it can act as a filler, an adhesive, a wood stabilizer, or a finishing for projects. Not only is this material very strong, doesn’t shrink, and is not affected by chemicals and water, but it will also bond to literally almost any type of material you need it to stick to. For these reasons and more, epoxy is prized by woodworkers everywhere for its unique capabilities.
Since epoxy is a resin and adhesive, the way in which it is applied demands a lot of responsibility on the woodworker to only use as much of it as needed… any excess of epoxy and you will be stuck trying to scrape it off, and if you use too little then it may not even stick at all which defeats the purpose of epoxy in the first place. If you happen to apply too much epoxy r you simply need to grind it down, you may be wondering – can you use a router to smooth everything out?
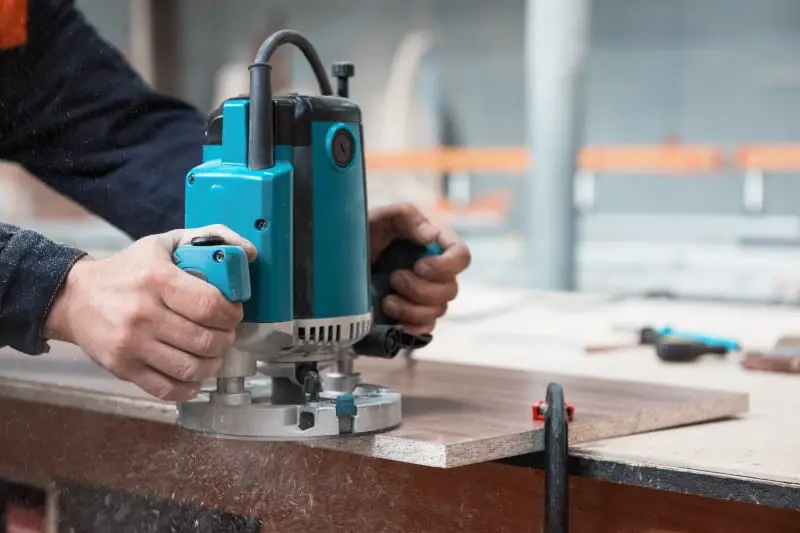
Yes, you can use a router on epoxy resin; that said, you can’t expect a perfectly finished surface of your wood material if you use an electric router. If you are using a router on epoxy, try to go as fast as possible and get it as close to the wood material as possible without damaging it.
This process can be dangerous in terms of the effect it can have on your wood; if you are building furniture or other projects that rely on a visually-appealing finished product, a router may not be your best bet for smoothing out the epoxy resin.
In this article, we will go over how to use a router on epoxy and then go over another method you can use to smooth out epoxy that works better than using an electric router.
Since epoxy is generally intended to look as ‘clean’ as possible, using a router on this material can be tricky; it is very easy to mess this up and either damage the material underneath your epoxy (your wood) or leave the epoxy in such a state that you might as well scrap the entire project altogether.
Since a router is usually an electric powered tool, chipping and overheating are also issues that come with using this piece of equipment on epoxy resin. Considering the chemical makeup of epoxy, it is not surprising that it can be overheated by an electric router, which then can ruin its original intended purpose. Also, it is not difficult to accidentally take way to much epoxy off from using a router and leave big dents in the surface, so be careful not to do that.
As long as you heed caution and follow these simple steps, using a router on epoxy should be fine.
Here’s how to do it:
If the epoxy was only applied recently, give it at least 24 hours in room temperature to ‘set’ and cool off before you take a router to it – if the epoxy resin is still fresh, it will not be hard enough to use the router on and it will get caught on your router bit.
Plugin your router and attach the router bit you plan on using – try to use the sharpest router you possibly can.
Use the router on epoxy the same way you would against the wood; get it as close to the wood as possible.
You should try to go as fast as you can; the slower you go, the more chance you have of overheating the epoxy and messing up your project.
If the router has adjustable speed, slow it do the lowest possible speed; this, combined with a fast-moving woodworker and a sharp router bit will result in the best finished product.
Unplug your router and clean the router bit.
If you want, you can sand the remaining epoxy resin; you cannot go too close to the wood or material underneath the epoxy with the electric router because you can damage it.
You might have to spend some time scraping off the epoxy from your router bit afterwards – this is a natural consequence of using an electric router on any epoxy resin.
Also, as with most woodworking projects, you do run the risk of dulling your router bit; if this happens, there is not much you can do other then try to keep using it or replace it if it is really dulled.
Cured epoxy is essentially ‘irreversible’ if it has had time to cool – a router works great against epoxy resin but there are other ways to do so that work even better.
If you don’t want to use a router on epoxy or you simply don’t have an electric router, sanding is a great alternative and is actually the preferred method over using a router.
Sanding Epoxy Resin
Sanding is one of the best ways you can use to get an ideal treatment for any surface you have epoxy resin on.
Let’s take a look at the downsides of sanding, wet sanding versus dry sanding, and how exactly to do it on epoxy resin.
Downsides Of Sanding
Although sanding is one of the better ways to attack epoxy, it is still not a perfect match for this tricky substance; epoxy that has been cured is very hard and sanding can only do so much to combat this.
Not only will it take some effort (that is, unless you are using an electric sander) but the epoxy resin will dull your sandpaper fairly quickly. Also, it can ‘clog’ the paper so much so that it must be cleaned before any continued use (if you are doing wet sanding, it will not clog as much and you won’t have to replace the paper as often).
Wet Sanding vs. Dry Sanding
Wet sanding, if you don’t already know, is simply sanding with the use of water or liquid to help get rid of the excess grit particles that are removed during the process.
With dry sanding, the material you are sanding will get caught into the sandpaper and make it so that you have to either clean out the bits from the paper or it will dull it so much so that you must replace it entirely.
When it comes to sanding epoxy resin, we highly suggest using wet sanding; this will remove any unevenness, flying particles, and will drastically reduce clogging from occuring. Also, your paper will stay in better shape and last longer – as mentioned, these are all benefits of wet sanding over dry sanding, and when it comes to a hard material (such as epoxy resin) these benefits go far.
You can, of course, dry sand epoxy resin… that said, it is not recommended. Besides all the downsides we’ve already mentioned, the chemical makeup of epoxy means that it can be heated up rather easily – if you dry sand epoxy resin, it can overheat and change shape or ruin the material underneath. Wet sanding will prevent any heating from occuring.
Now let’s look at exactly how you can sand epoxy resin.
How To Sand Epoxy Resin
For this step-by-step tutorial, we will assume you are using wet sanding (which is recommended).
Remember, you cannot do any wet sanding with an electrically operated machine – in doing so, you run the risk of shocking yourself (among other electric-related hazards).
So, when wet sanding epoxy resin, do so with a hard rubber sanding block.
Here’s how you can sand epoxy resin:
If you don’t already own one, acquire a sanding block with a soft backing.
Prepare a container with water – the temperature of the water does not matter.
Dip your sandpaper into the container of water.
Sand the surface of epoxy resin in a circular motion.
Sand until you are as close as you can get to the material underneath without actually touching it.
Habitually remove any residue in your sanding paper so that it is as effective as possible against the epoxy.
Clean the epoxy surface after sanding to get rid of any clinging materials from the paper.
If you are adding more epoxy to the surface or painting it afterward, wipe down the epoxy surface with a towel or paper towel… then, sweep the epoxy surface using a regular dust broom.
Now, if you have to use dry sanding, that’s okay – the steps remain very much the same. Just remember to wear a mask since the airborne particles can be hazardous to your health – try to work in a room that is ventilated. You will need to stop intermittently to remove the grit from your sandpaper.
Hi, I am Paul Smith. I am the man behind this blog. I am a passionate woodworker. I would like to share with you guys the experience of learning woodworking.
As someone who frequently works with medium-density fiberboard (MDF), I've learned that knowing how to waterproof MDF is crucial to maintaining its functionality and durability. MDF is a popular...
Area rugs can be an elegant and functional addition to any home. Over time, though, they tend to accumulate dirt, debris, and stains that can be difficult to remove. I recently discovered that...


")
")
")

