As someone who frequently works with medium-density fiberboard (MDF), I’ve learned that knowing how to waterproof MDF is crucial to maintaining its functionality and durability. MDF is a popular choice in woodworking and carpentry projects thanks to its affordability, ease of use, and versatility. However, since it is composed of wood fibers and adhesive, this material is prone to water damage and swelling if not properly protected.
I understand that many of you may be looking for ways to waterproof MDF for various projects such as furniture, cabinets, or decorative panels. In this article, I will share my knowledge about the different methods for waterproofing MDF, ensuring that your projects remain resilient against moisture and stand the test of time. This will be your comprehensive guide to protecting MDF from water damage, allowing you to enhance its usability and longevity.
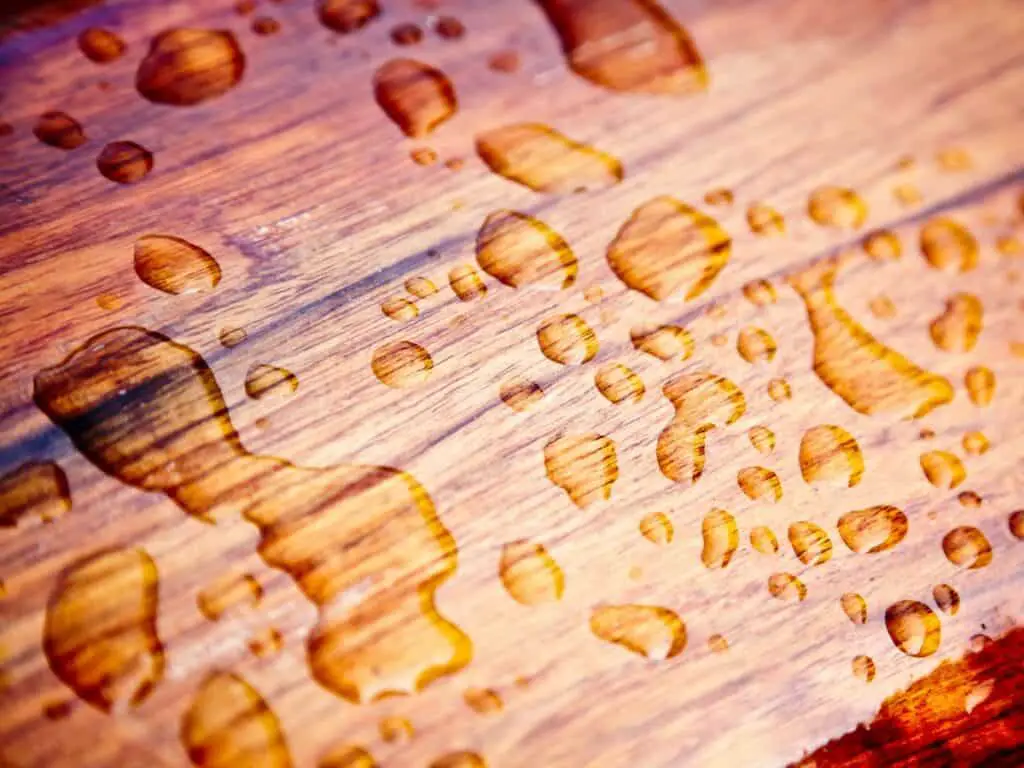
When dealing with MDF, it’s important to understand the difference between waterproof and water-resistant materials. As a woodworker, I need to ensure that my projects stay protected from moisture and humidity.
Waterproof materials are those that completely prevent water from penetrating their surface. These materials can be submerged in water without allowing moisture to enter their core. This is crucial for projects that are regularly exposed to water or in areas with high humidity.
On the other hand, water-resistant materials can only withstand a certain amount of moisture before they start to become affected by it. These materials are designed to repel water to a certain extent but are not entirely impervious to moisture. In high humidity settings or when exposed to water for prolonged periods, water-resistant materials can still degrade over time.
For MDF, it is inherently vulnerable to moisture and humidity. Due to its composition of wood fibers and glue, MDF can swell, warp, or disintegrate when exposed to water. To protect MDF from these issues, we need to apply a few coats of surface treatments, such as sealers, primers, and paints, transforming it from water-sensitive to water-resistant.
Some common steps to make MDF water-resistant include:
Sanding the MDF surface to ensure proper adhesion of treatments.
Applying a primer or sealer to form a moisture-resistant layer and improve paint adherence.
Applying a waterproof paint, varnish, or stain to create a durable and water-resistant finish.
Keep in mind that these treatments can make MDF water-resistant, but not entirely waterproof. In other words, the treated MDF can handle occasional exposure to water and moisture, but it is not suitable for extended submersion or extremely wet environments.
In summary, when working with MDF, it’s essential to consider the differences between waterproof and water-resistant materials to choose the appropriate treatments and protect the MDF from moisture and humidity. With the right approach, we can extend the life of our MDF projects in various conditions.
Choosing the Right Materials
Waterproof MDF vs MR MDF
When working on a project that requires moisture resistance, it’s important to choose the right materials. Wood-based materials, like MDF, can be prone to damage when exposed to moisture. In most cases, I recommend using either Waterproof MDF or Moisture-Resistant (MR) MDF depending on the project’s requirements.
Waterproof MDF is specially treated to resist water absorption and damage caused by moisture. This makes it an ideal option for projects where it may be subjected to direct water contact or high humidity. However, it is essential to note that Waterproof MDF should still be primed and sealed for maximum protection.
In comparison, MR MDF has a slightly higher resistance to moisture compared to standard MDF but may not withstand direct water contact. While MR MDF is suitable for projects with occasional humidity, such as indoor cabinetry or furniture, it is not recommended for outdoor or high-humidity environments.
Waterproof MDF: Ideal for direct water contact or high humidity. Requires priming and sealing.
MR MDF: Suitable for occasional humidity or indirect moisture exposure. Not recommended for outdoor use or high-humidity environments.
Plywood Alternatives
If I am looking for more robust alternatives to MDF, I might consider using plywood. Plywood is a versatile and robust material made up of multiple layers of wood veneers stacked together and bonded with adhesive. This construction provides several advantages over MDF, including higher strength and impact resistance.
When it comes to water resistance, plywood can be found in several grades with varying levels of water resistance:
Marine-Grade Plywood: This is the most water-resistant plywood available and is suitable for projects that require exposure to water, such as boats and outdoor furniture. Be aware that marine-grade plywood can be more expensive than other types of plywood.
Exterior Plywood: This type of plywood is made with water-resistant glue and is intended for outdoor use. Although it is more resistant to moisture than standard plywood, exterior plywood should still be sealed and properly maintained for maximum durability.
Standard Plywood: This is your typical plywood, and while it is not specifically designed for water resistance, it can still perform reasonably well indoors if properly treated and protected.
In conclusion, knowing which materials to choose for a project is essential for durability and longevity. When selecting between Waterproof MDF, MR MDF, and plywood alternatives, carefully consider the specific requirements of the project and the available budget to ensure you make the best choice.
Steps for Waterproofing MDF
Cleaning the Surface
Before starting the waterproofing process, it’s essential to clean the MDF surface thoroughly. I like to use a microfiber cloth or a slightly damp sponge to remove any dirt or debris. This step ensures proper adhesion of the primer and water-resistant paint, leading to a more durable waterproof finish.
Sanding the Edges
After cleaning the surface, the next step is to sand the edges of the MDF. I use a fine-grit sandpaper, such as 220-grit, to achieve a smooth surface. This helps remove any rough areas, allowing for better adhesion of primer and paint. It’s important to sand only in the direction of the wood grain to avoid any visible scratches or marks.
Applying Primer
Before applying the water-resistant paint, I always use a primer specifically designed for MDF. This primer helps the paint adhere better and forms a seal that prevents moisture absorption. For this step, I prefer using a paintbrush for the edges and a roller with a 3/8-inch nap to cover the large surfaces with an even layer of primer. I let the primer dry for approximately six hours before moving on to the next step.
Sealing with Water-Resistant Paint
Now comes the most crucial step, which is sealing the MDF with a water-resistant paint, varnish, or stain. With a good quality sealant, I apply an even coat to the surface using the same paintbrush and roller as before. Remember to let the paint dry for about four hours before applying the final layer of sealer.
For the final coat, I follow the same process as before, but I allow a drying time of at least three days to make sure the MDF is moisture-resistant.
By following these steps, I’ve managed to waterproof various MDF items, ensuring their durability and protection from moisture damage.
Waterproofing MDF Furniture
Kitchen Cabinetry
As a DIY enthusiast, I’ve found that one of the best materials to create kitchen cabinets is MDF, and ensuring they are moisture-resistant is crucial. I first start by applying a high-quality primer to the entire surface of my MDF furniture, since it helps the waterproofing layer adhere properly. After letting the primer dry for six hours, I use a 3/8-inch roller and a paintbrush to apply a water-resistant paint or sealant, with special focus on corners and edges. Drying time should be about four hours, and a final layer should be applied for complete protection. After all, my kitchen cabinetry is exposed to moisture from activities like washing dishes and cooking.
Bathroom Cabinetry
Waterproofing MDF in bathroom cabinets is essential, as humidity and water exposure is considerable in this area. In my approach, I follow the same procedure I use for kitchen cabinetry but pay extra attention when sealing the corners and edges, as these areas are more prone to water infiltration. Latex sealant, epoxy sealant, or Ronseal Woodstain are some of the products I have found helpful in providing moisture resistance. I allow the final layer to dry for at least three days to ensure complete protection for my bathroom cabinetry.
Shelving
Shelving units constructed from MDF can also benefit from waterproofing, especially if they are in moisture-prone zones. My process for waterproofing the MDF shelves involves lightly sanding the surface with 220-grit sandpaper, removing any dust, and then applying a good quality primer. I let the primer dry and then, as with the other applications, use a roller and paintbrush to apply a waterproof sealant or paint. When waterproofing my MDF shelving, I make sure to apply an even coat on all sides, edges, and corners, letting each side dry before flipping it over. Remember to stay patient, as it takes time for the layers to properly dry and provide optimum protection.
Additional Protection Methods
Using Wood Sealant
One effective method to provide additional protection to MDF is through the application of a wood sealant. Before applying the sealant, I make sure to sand the surface of the MDF to ensure maximum adhesion. Next, I apply a thin layer of sealant onto the MDF using a paintbrush or roller, paying attention to evenly cover all areas and edges. Allowing the sealant to dry completely before applying a second coat helps to ensure better waterproofing results. The sealant used for this purpose should be specifically designed to protect MDF boards, like Kilz Adhesion High Bonding Latex Primer and Sealer.
Applying Lacquer
Another way I protect my MDF projects against moisture is by applying a coat of lacquer. Lacquer has the advantage of enhancing the appearance of the MDF as well as providing a protective barrier against moisture. To effectively apply lacquer, I start by sanding the MDF surface to create a smooth surface for the lacquer to adhere to. Then, using a paintbrush or roller, I apply a thin and even layer of lacquer, ensuring that all sides and edges are covered. After allowing the first layer to dry completely, I apply a second coat for optimum protection.
Utilizing Waterproof Paint
Waterproof paint is also a great option to protect MDF against moisture. To apply waterproof paint, I follow a similar process as with lacquer or sealant. First, I sand the surface of the MDF to ensure maximum adhesion for the paint. Then, using a paint roller, I apply an even coat of waterproof paint to the MDF, paying close attention to corners and edges. Once the paint has dried, I flip the MDF and paint the other side. If needed, I apply additional coats to achieve the desired level of protection. A good example of waterproof paint to use on MDF is JetCoat Farm Pride Acrylic Outdoor Paint.
By using these methods, I ensure that my MDF projects are well protected against moisture and have a durable, long-lasting finish.
Preparing and Working with MDF
Cutting and Shaping MDF
When I work with MDF, I make sure to take the necessary precautions while cutting and shaping it. Due to the high amount of sawdust produced while cutting MDF, I always wear a dust mask and ensure proper ventilation in my workspace. A fine-toothed saw or a carbide-tipped blade with many teeth works best for cutting MDF, as they produce smoother cuts.
During the cutting process, I steadily guide the material through the saw to prevent chipping or tear-out. Moreover, to achieve smoother edges, I prefer using a router with a straight bit or a hand-held power sander.
Accounting for Moisture and Humidity
MDF is susceptible to water damage and changes in humidity. Therefore, I take measures to prevent moisture from affecting my projects. Before painting or sealing the MDF, I ensure that the board is completely dry by storing it in a low-humidity environment for some time.
To further protect the MDF from moisture, I follow a step-by-step waterproofing process. This includes applying a moisture-resistant primer or sealer, followed by waterproof paint or varnish. It’s essential to apply multiple coats and allow each coat to dry completely before proceeding with the next layer. This process helps me create a durable protective barrier that shields the MDF from potential water damage and humidity fluctuations.
Taking the time to cut and shape MDF correctly, as well as accounting for moisture and humidity in my projects, allows me to work with MDF efficiently and produce long-lasting results.
Tools and Materials Needed
Before starting the waterproofing process for MDF, I always make sure to gather all the necessary tools and materials. This helps me efficiently perform the job without any interruptions. In this section, I will outline the main items I require for waterproofing MDF.
First and foremost, I need a high-quality latex primer. The one I usually use is KILZ Adhesion, which is specifically designed for smooth surfaces like MDF. This primer acts as the base coat, ensuring that the waterproof paint or sealant adheres properly to the MDF surface.
Next, I must have a suitable latex sealant or waterproof paint. This can either be a water-resistant acrylic or polyurethane paint. It provides a protective barrier against moisture, making the MDF water-resistant.
One crucial tool I always gather before starting is sandpaper. I typically use 220-grit sandpaper to smoothly sand the MDF surface before applying the primer, as this helps create a better surface for the primer and paint.
To apply the primer and paint, I need reliable brushes and rollers. These should be of good quality to ensure a smooth and even finish. A roller tray is also necessary to conveniently hold my paint and primer while I work.
For those hard-to-reach areas or if I prefer an even coverage, a spray can is an excellent option to have on hand. It speeds up the process and provides a consistent coating on the MDF surface.
Finally, an optional addition to my list is a drop cloth or tarp to protect any surrounding surfaces, such as a deck or workspace, from paint drips or spills.
In summary, here is a list of the tools and materials I need for waterproofing MDF:
Latex primer (e.g., KILZ Adhesion)
Latex sealant or waterproof paint
220-grit sandpaper
Brushes and rollers
Roller tray
Spray can (optional)
Drop cloth or tarp (optional)
Saving Time and Money
When it comes to waterproofing MDF, I’ve learned a few tricks that have helped me save both time and money. It’s important to know that MDF cannot be made 100% waterproof, but with the following steps, I considerably increase its resistance to moisture.
First, I make sure to paint all surfaces of the MDF board, including its edges. I use a high-quality primer suitable for MDF, as it provides a strong base for the topcoat. Applying two coats of primer ensures that the MDF board is evenly covered and better protected against moisture.
Next, I choose a suitable paint specifically designed for moisture-prone areas. Often, these paints are more resistant to moisture and, in turn, help reduce the impact of water on the MDF. I usually apply two coats of paint, allowing each coat to dry thoroughly before applying the next one.
To enhance water resistance further, I recommend sealing any joints or seams using a high-quality, waterproof, and paintable caulking product. This prevents water from seeping into gaps between the MDF pieces and minimizes potential damage from moisture.
In addition to the above steps, it’s essential to maintain the MDF regularly. I always check for any signs of peeling or water damage so I can address issues early before they become significant problems. By doing so, I save on costly repair or replacement in the long run.
By carefully selecting the right products and taking the time to apply them correctly, I’ve found that I can effectively waterproof MDF and enjoy the beautiful finish it provides without spending a fortune.
Final Thoughts
When I was waterproofing my MDF, I found it crucial to first apply a primer to create a solid base for the subsequent waterproof coats. This made sure that the sealant or water-resistant paint adhered well and provided the desired protection. As mentioned by Forest Plywood, it’s essential to let the primer dry for at least six hours before proceeding with the next steps.
Applying the waterproofing sealant or paint came next. I found it helpful to use a 3/8-inch roller for a smooth application, ensuring even coverage across the MDF surface. It is essential to pay attention to the corners and edges, using a paintbrush to access those harder-to-reach areas. Drying time plays a significant role in achieving a moisture-resistant MDF, so I allowed my project to dry for at least four hours, as suggested by BuildEazy.
The final aspect I focused on was applying multiple coats of the sealant or paint. As Waterproof Tips recommends, after applying an initial thin layer, it’s essential to allow each coat to dry entirely before adding the next one. This process should be repeated until the desired level of waterproofing is achieved. If in doubt, always refer to the product label for guidance on the suggested number of coats and drying times.
By following these steps, I successfully waterproofed my MDF project. It’s essential to be patient throughout the process, allowing adequate drying time between coats. This ensures a solid, moisture-resistant finish that will protect the MDF from water damage and prolong its lifespan.
Hi, I am Paul Smith. I am the man behind this blog. I am a passionate woodworker. I would like to share with you guys the experience of learning woodworking.
Area rugs can be an elegant and functional addition to any home. Over time, though, they tend to accumulate dirt, debris, and stains that can be difficult to remove. I recently discovered that...
Table saws are essential tools for woodworking projects, and choosing the right one can make all the difference in the quality and precision of your work.
Contractor, cabinet, and hybrid table...


")
")

")


")